Lets start this blog post with a confession: I haven’t been a huge fan of headboards – I don’t see the purpose of having one and it takes up space in my small bedroom. So, I’ve never gotten one of my own.
I have this wall space above the head of my bed (where a headboard would sit if I had one) where I used to put up photographs, papers with things I’m supposed to memorise, things I made at school (mostly from math class – I was more mathsy than artsy) and just things I found along the years. So I guess you could say it was my “thinking board”.
I took everything off of my wall down when I moved to Melbourne for university. I came back earlier this year and thought of doing something with that bare wall. So, this is what I decided to do:
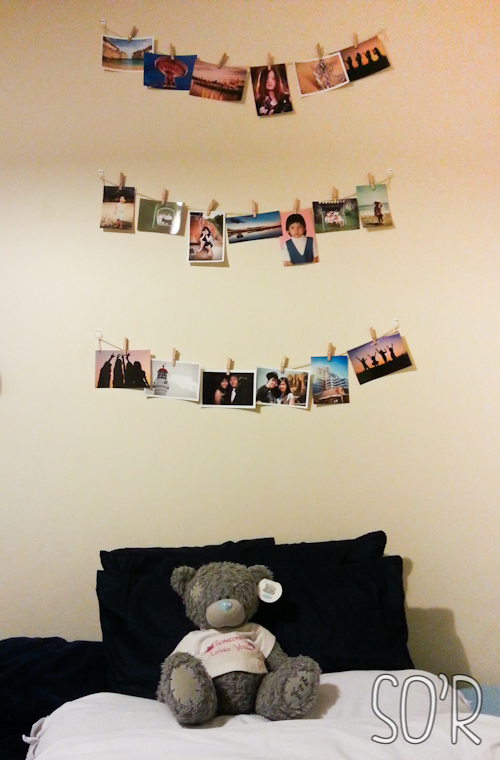
My Photo Wall
Since I’ve been doing a lot of photography in the past few years or so, I put together a few photographs that I am proud of or that held special memories and thought of just sticking them on the wall like what I did in my college room. But then I thought, you know what, I’m going to try something different.
I’d seen people do this all over the internet so this is hardly my own idea. I promise you it’s super simple, but this is how I did it:
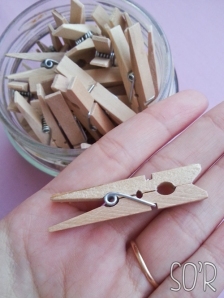
Mini Pegs
MATERIALS:
- Photographs of roughly the same size (doesn’t have to be the same size but I wanted mine to look somewhat uniform)
- Tiny Pegs (I got the mini pegs from Riot on a 50% discount)
- Twine
- Small Wall Safe Hooks (I used ones intended for fairylights from officeworks)
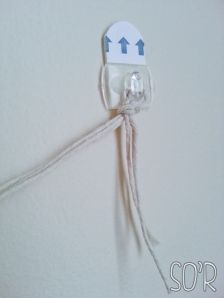
Slip knot on the hook
METHOD:
- Measure the width of the space on the wall and decide how wide you want each line of photographs to be
- Measure the height that you’ve got to work with and decide on approximately how tall you want your photo wall to be as well as the intervals (the spaces in between the lines)
Hint: make it a nice number for you to divide! For example, I wanted 3 lines and I had just over 1m to work with so I decided with 30cm intervals which gives me about a 1m tall photo wall - Put the hooks on each end (or wherever needed) according to the packaging (mine said to clean the wall with alcohol, apply the hook and leave it for about 12 hours before use)
- Cut the twine
I cut three 1m pieces for each line – so nine 1m pieces in total - Knot each ends – I used a slip knot (self tightening knot)
How to knot: http://paracordcentral.org/wp-content/uploads/2013/04/self-tightening-knot.jpg - Decide on the arrangement of the photographs
- When your hooks are ready, put the string up, then use the pegs to hold the photographs on the string.
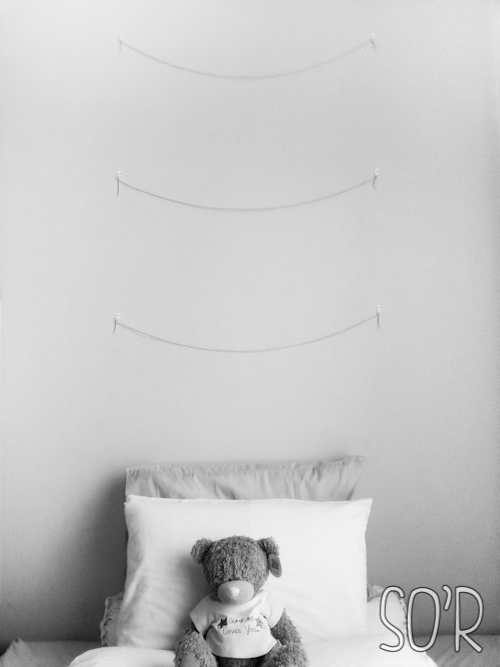
Plain Photo Wall
You’re Done! Easy right? Show me if you did this or something similar to your wall! 🙂
Oh and if you want to see something pretty, check out my photography blog Precious.S2 Photography in about 11.5 hours!
Lots of smiles,
Sita Carolina
