Rubbing Alcohol

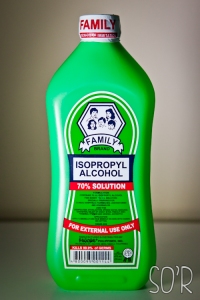
Family Brand Rubbing Alcohol

Family Brand Rubbing Alcohol

Hello again smiley faces!

I hope you are all well.

Today I would like to talk about Rubbing Alcohol. I have recently learnt that this not-so-expensive product is actually very versatile and useful.

Before that though, I want to say that there are cheaper rubbing alcohols around rather than the Isocol brand (the one with the dinosaur on it) they sell at most pharmacies and grocery stores. Though that one is probably the most convenient one to get. However, I don’t know about you but I refuse to pay AUD$10 for one bottle of this stuff.

I actually wanted to get some rubbing alcohol since a while ago but I thought that I still had some at home. Being quite unfamiliar with the stuff, I had no idea that they have an expiry date nor did I know much use of them other than cleaning cuts (which I never do) and to clean walls before you stick things (like hooks) on it. So, long story short, my supply at home was “expired” and I had to throw it out (I searched online whether they can still be used for general cleaning around the house but they all said that the chemicals have somehow changed or something – sorry not a chemist). But again, I didn’t want to spend another $10 to get the bottle which most of its contents will probably end up in the bin again like the last one.

Luckily enough, I held out buying it long enough to come across this particular brand at the asian grocery store at Canning Valle (Perth) which costed me around $5 a bottle. The bottle looks pretty similar if you ask me. Green, same size. Just different brand/sticker and a different lid (click here to see what the Isocol rubbing alcohol looks like).

So what “other uses” did I manage to find for rubbing alcohol?

Personally, I used it to fix my broken blush like one of the many tutorials around on YouTube. The easiest (and laziest, but in a good way) is probably Kandee Johnson’s tutorial. But you can search many others on the internet or if you prefer, a video version on YouTube.

But I also found all these other ways to use it which I have yet to try (but I’d imagine it’d be useful). Here are some of them:

  • Clean your phone (wipe down)
  • Erase permanent markers
  • Clean white boards
  • Make shape-able ice-packs
  • Clean bathroom fixtures (chromes)
  • Clean hairspray off mirrors (although I don’t even own a hairspray right now)

So I hope this post will benefit at least ONE person out there and I’ll post another post soon!

Lots of smiles,

Sita

Glad I have you: Leather Puncher

Hello lovely smiles,

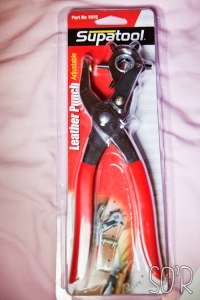
Leather puncher in its packaging

Leather puncher in its packaging

About a month ago, as some of you might remember, I bought an AUD$1 belt at a sale about a month ago and they were way too big for me. I talked about getting a leather puncher so I can customise the belt to my size. Well, I’m telling you today I’m glad I decided to buy this little gadget! Now, I can surf the sales all I want and since my size is normally the one that is gone first (XS/S) and therefore found it hard to buy belts on crazy sales in the past. Now, I can buy larger belt sizes and will still be able to wear them!

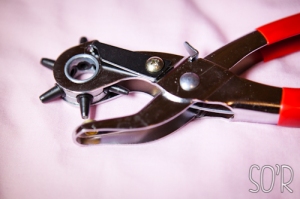
If you are petite in build like me, then I definitely recommend this investment. I suggest buying the revolving one with multiple sized “punchers” (for lack of a better word – I don’t know what you’d call them) since different belts will require different sizes. Especially those fastened with a push button.

I researched DIY alternatives and they are very tedious, uncertain and the results are not satisfying at all! (messy, rough, etc) Trust me, $10 will be paid back in a flash! (e.g. I recently bought a supposedly $14 belt for $1 which was too big and I had to punch a few extra holes with my leather puncher at home. Now, I think by having the leather puncher, I saved $13 — BAM! Leather puncher paid back.)

Revolving leather puncher - multi-sized puncher

Revolving leather puncher – multi-sized puncher

A great tip if you are in AustraliaDO NOT buy this from Spotlight. I tried finding something like this there and it costs AUD$25+. I luckily went to Bunnings (a home-improvement/hardware store) shortly after and found this one that I bought for a little less than AUD$10.

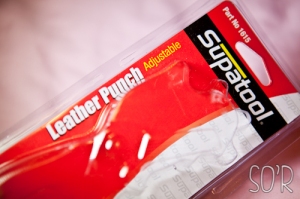
Leather puncher packaging

Leather puncher packaging

I also searched online and found nothing worthy of buying less than $8. And that didn’t include shipping either. The wait times for delivery and such were around 1 month. Totally would have costed me more than $10.

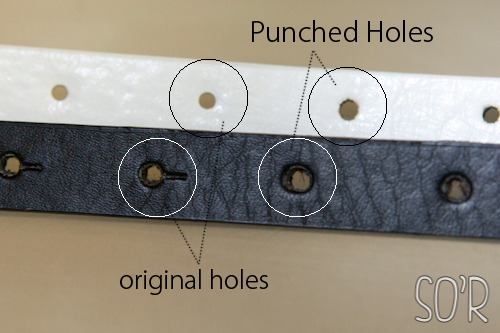
hole comparisons

Holes originally on the belt vs holes I made using the Leather Puncher

UPDATED: here is the hole comparisons – original holes vs punched holes. In my opinion the holes are really neat and you wouldn’t be able to tell the difference unless you stare at them really well. With my black belt, I had to make the hole bigger since I didn’t want to even attempt to make the slits.

If you would like to use this, then make sure you start from a hole that is a little smaller in size than what you think it might be. If you made a mistake in judging, you can always go bigger, but not smaller.

So that is all smileys, I hope you found this useful!

Lots of Smiles,

Sita

Gloss [Perth] Haul: April 2013

If you didn’t know already, I’m a little bit of a nail polish addict. When there’s colour on my nails, I look at it and I feel happy. I especially feel so happy when I put nail art on them myself.

The Haul

Recently, it has come to my attention that there’s discount nail polish in the city (Perth city to be exact). This is thanks to Cindy from Rose Gold Whimsy. So we decided after our little trip to Harbour Town, we would continue our “outing” to the city for some lunch and to check out the discounted nail polishes Cindy mentioned – Gloss Accessories.

Voila! There were Revlon nail polishes, 3 for $12 and Sally Hansen nail polishes at 3 for $10.

I’ve been using Sally Hansen’s top coat and base coats for a while now (maybe 2 years?) and I love all the ones that I’ve tried. Sally Hansen’s colour polishes on the other hand, I haven’t really tried with the exception of one from their Xtreme Wear line in “Flirt”. With Revlon nail polishes, I bought some (more like a lot) a few months ago for just over $2 from an online discount store. So I decided to go for Sally Hansen.

Sally Hansen / Gloss Haul

I shared this deal with Cindy – I bought 2 and she bought 1. I got a Diamond Strength No Chip Nail Colour in number 30 “Lilac Chantilly” and a No Chip 10 day nail colour in white tip.

I also got this Sally Hansen Insta-Dri Speed Dry Drops which I have yet to try for about $6 which I think is a STEAL as they are normally around $10-$15 at drugstores.

I still don’t know how to use white nail polish properly – either that, or white polish is always streaky, or this one I got is really bad. But I love the Lilac Chantilly colour – which is a light purple colour, as suggested by the name and the picture.

Sally Hansen Insta-Dri Speed Dry Drops

The Insta-Dri Speed Dry Drops was interesting for me to open. It came with a lid and then the pipette is in a separate sealed plastic. I am excited to try this. In fact, I will try this right now. It does say in the bottle to “Apply base coat, nail colour and top coat. Wait for 60 seconds after applying top coat. Apply 1 or 2 drops to each nail.” I may be back with a review of this.

So that was all I got at Gloss. I’m not that into make-up so I didn’t even really look at the make-up there.

Hope you had a wonderful weekend!


Have you used the Sally Hansen Insta-Dri Speed Dry Drops before?


Lots of Smiles

-Sita

$1 Candle!

I know, I can’t believe what I saw either.

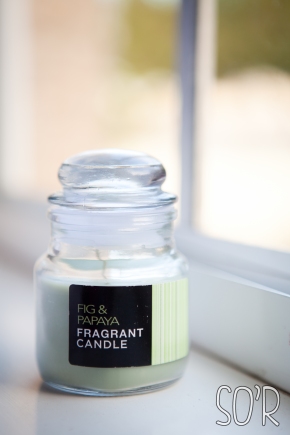
$1 Candle

$1 Candle

I’m not normally a candle-burner and I am sensitive and particular to smells. (I am one of those people who can smell cucumber, celery, rain, coriander, etc) I absolutely do not enjoy sweet milky smells unless it’s a real cupcake or cookie baking. I have tried a couple of the Glade candles (the Lavender and the colour-changing candle) a while ago and I love them but most of the time I hesitate buying candles just because I don’t think they’re worth the price.

I went to K-Mart (Australia) the other day and found these little candles for $1 each! I know, out of all places to find candles. But hey, Australia don’t have Bed Bath and Beyond and so the ever so popular Slatkin & Co. and Yankee candles are almost impossible to find (unless if I buy them online). I was of course sceptical as to how these candles smell, but at the same time I couldn’t resist smelling all the scents they had.

The candle that I picked up was the first candle I smelt and oh my, it smells fresh and fruity and delicious. Then I thought I should smell the other ones too – bad choice. They all smelt horrible to me and I hated them.

In the end what made me buy this candle was the price. For $1, even if it doesn’t make my room smell nice, at least I will have a candle for possible future photography projects.

The candle is burning on my desk right now and it has been for the past maybe 20 minutes and yeah I do smell it from here. So I guess the $1 was definitely worth it.

Anyway, do check these candles out. TIP: I heard that the correct way to smell candles at the store is to smell the lid. That way, all the scents are already “mushed” together and you’re not just smelling one element of the candle.

Let me know if you like these kinds of posts so I can do more!

Lots of smiles,

Sita