10c MUD Nail Polish?

Wow, it’s been a while since I last posted anything hasn’t it…

Earlier this week, I was randomly going into Woolworths near where I lived and BAM. I saw what could possibly be a pot of gold (to me anyways…). Nail polish clearance for TEN CENTS. I am a nail polish lover if you can’t already tell by my previous posts or if you’re a new reader to my blog.
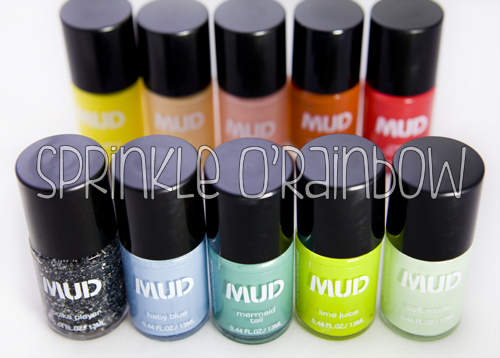
Ten 10c MUD Nail Polishes

Ten 10c MUD Nail Polishes

When I saw these MUD Nail Polishes, I was a little sceptical of their quality since I haven’t heard of their brand before. But then I thought: “They’re 10c. If I buy ten of them, that makes $1. If they work awesomely then GREAT. If not, I’ll re-purpose them for some DIY or something. All else fails, I’ll just chuck it away. They’re only $1 total.” So I bought ten of them.

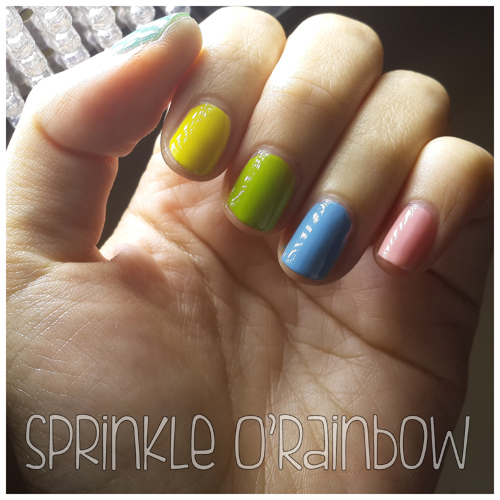
Some of the polishes on my finger nails

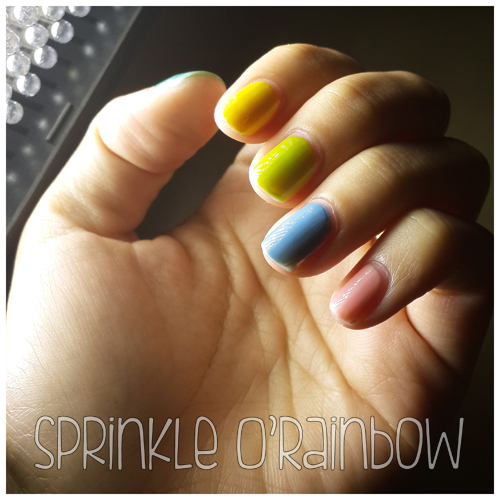
Some of the polishes on my finger nails a few hours after application.

I tried most of them on my ten fingers with two of the colours repeated and another two I didn’t use. I did my nails on Monday with the Sally Hansen Hard as Nails Hardener for the base coat, two coats of the colour, and Sally Hansen Mega Shine top coat (my favourite base and top coats ever!). It is now Friday and other than slight wear on the edges of my nails, I don’t see any chips which is amazing!

The same nails today.

The same nails today.

So it was a pot of gold in the end.

Plus, don’t you think that photograph of the nail polishes summarise “Sprinkle O’Rainbow” really well? 😀

Lots of Smiles,

-Sita

DIY: My Neighbour Totoro Shoes

Hello hello so this was my Sunday Arvo / Rainy Day project yesterday – TOTORO SHOES!

I’d seen a few pictures on Pinterest on grey shoes decorated with the Totoro theme. Being an anime & totoro fan myself, I decided to give it a go on these AUD$3.50 K-Mart shoes. Really you can’t go wrong with a $3.50 pair of shoes. Worst case, it looks ugly and you throw away $3.50 with some experience on DIY-ing a shoe.

Here’s how I did it:

Face Inspiration

Face Inspiration From Pinterest

Materials:

  1. A pair of grey shoes,
  2. White paint (I used acrylic paint since that’s what I have at home)
  3. Black Sharpie
  4. Black ballpoint
  5. Toothpick
  6. Paper
Spirits Inspiration

Spirits Inspiration From Pinterest

Method:

TOTORO:

  1. Prepare the picture of Totoro you want to add to the shoe i.e. I used this image. You can either print or do what I did: trace this straight from my screen on to paper. It turned out to be the perfect size for where I want to put the drawing.
  2. Cut out the totoro outline
  3. Trace the outline onto your shoe. You can be as detailed or as simplistic as you want.
  4. Mark dots on the shoe of where the eye, nose, mouth are supposed to be. I did this by placing the template on to the shoe and then folding where I have to mark. I marked the top of the eyes, a dash for the nose, and a dot at the top, bottom, left and right of the mouth.
  5. Finish the outlines with ballpoint – this means draw 2 circles for the eyes and connect the dots on the mouth and I added the teeth lines here
  6. Paint the whites and wait to dry (time of drying depends on paint type) – eyes & mouth
  7. Outline everything with sharpie!

SPIRITS:

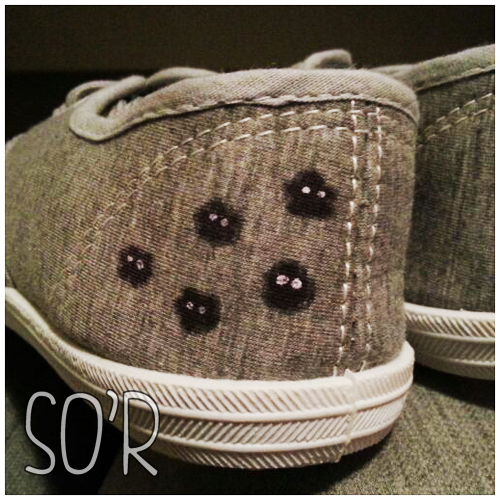
  1. Draw hairy black blobs – I drew them like how I would draw daisies since the sharpie bleeds a little.
  2. Draw eyes on the blobs using a toothpick (or you can use anything with a point) dipped in a little bit of your white paint.
  3. Wait for it to dry and you’re done!

Here’s the results:

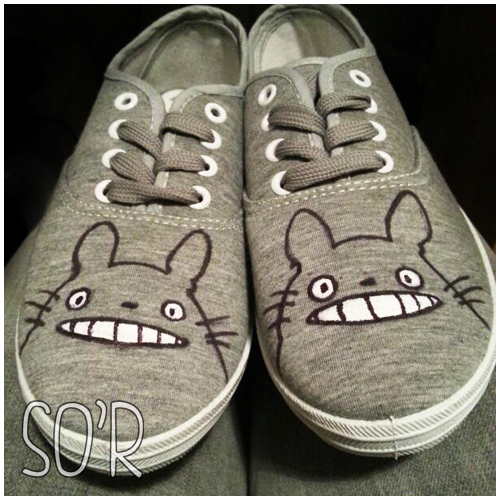
Front of the shoes (Totoro Face!)

Front of the shoes (Totoro Face!)

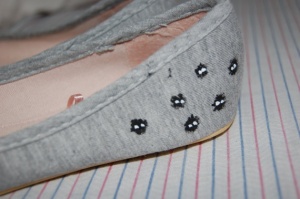
Back of the shoes (Spirits!)

Back of the shoes (Spirits!)

This probably took me half an hour to do not including the wait time. Outlining the drawing takes literally 1 minute.

This was a very easy, quick & cheap DIY. You can also use this method not only to do Totoro shoes but for any design!

What do you guys think?

Lots of Smiles,

Sita

DIY Toner for Acne Prone Skin – Dupe for Proactiv Toner?

So I mentioned in my last post that I am using a DIY toner to replace my Proactiv toner. I was inspried by an older video by SecretLifeOfABionerd (a.k.a. K.L.) on Youtube about this easy and extremely cheap DIY toner.

Ingridients: Aspirin + Witch Hazel.

The ingridients are easy to find at my local supermarket – Witch Hazel and Aspirin. Though the prices here in Australia is CRAZY compared to the U.S. prices mentioned by K.L. in her video. I bought a bottle of Witch Hazel for about AUD$6.67 and a box of Aspirin for AUD$4.49. I wasn’t sure if the generic supermarket brand (which only costs AUD$0.95 for the same amount) will dissolve well. Maybe next time I will venture out and try it and I will update you on that.

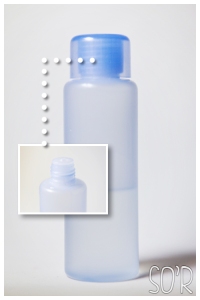
My bottle of Toner.

My bottle of Toner.

Since the aspirin here looks way different to that shown by K.L. in her video, I had to make an “educated guess” as to how much aspirin/witch hazel to mix to  make my toner. I don’t think exact measurements would matter here, but correct me if I’m wrong.

What I did was I snapped 5 of the aspirin tablets into quarter pieces or smaller and chucked it into the squeezy bottle I had laying around (cleaned in boiling water to sanitise). I then filled it up (slowly, since the aspirin I bought fizzes) with Witch Hazel until the bottle is about 7/8 full.

I have been using this toner for about 3 weeks now and I don’t see much difference with my skin compared to when I was using the Proactiv toner. Yay for me? This DIY version not only costed me only a fraction of what Proactiv costed me but I don’t notice much of a difference in their results.

The only downside was the scent. I intend to add a few drops of Lavender oil into my next batch of Toner and hopefully that will be a successful experiment. Again, I will do another blog post updating you on this.

Here is K.L.’s Video:

Thank you for joining me in this journey of clearer, better skin!

Lots of Smiles,

Sita.