Hello hello so this was my Sunday Arvo / Rainy Day project yesterday – TOTORO SHOES!
I’d seen a few pictures on Pinterest on grey shoes decorated with the Totoro theme. Being an anime & totoro fan myself, I decided to give it a go on these AUD$3.50 K-Mart shoes. Really you can’t go wrong with a $3.50 pair of shoes. Worst case, it looks ugly and you throw away $3.50 with some experience on DIY-ing a shoe.
Here’s how I did it:
Face Inspiration From Pinterest
Materials:
- A pair of grey shoes,
- White paint (I used acrylic paint since that’s what I have at home)
- Black Sharpie
- Black ballpoint
- Toothpick
- Paper
Spirits Inspiration From Pinterest
Method:
TOTORO:
- Prepare the picture of Totoro you want to add to the shoe i.e. I used this image. You can either print or do what I did: trace this straight from my screen on to paper. It turned out to be the perfect size for where I want to put the drawing.
- Cut out the totoro outline
- Trace the outline onto your shoe. You can be as detailed or as simplistic as you want.
- Mark dots on the shoe of where the eye, nose, mouth are supposed to be. I did this by placing the template on to the shoe and then folding where I have to mark. I marked the top of the eyes, a dash for the nose, and a dot at the top, bottom, left and right of the mouth.
- Finish the outlines with ballpoint – this means draw 2 circles for the eyes and connect the dots on the mouth and I added the teeth lines here
- Paint the whites and wait to dry (time of drying depends on paint type) – eyes & mouth
- Outline everything with sharpie!
SPIRITS:
- Draw hairy black blobs – I drew them like how I would draw daisies since the sharpie bleeds a little.
- Draw eyes on the blobs using a toothpick (or you can use anything with a point) dipped in a little bit of your white paint.
- Wait for it to dry and you’re done!
Here’s the results:
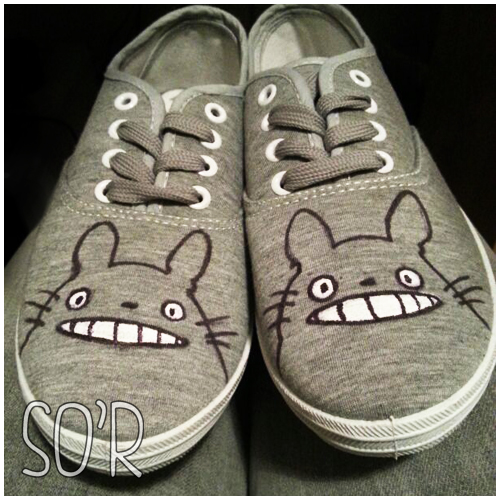
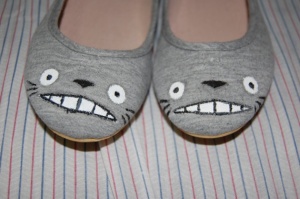
Front of the shoes (Totoro Face!)
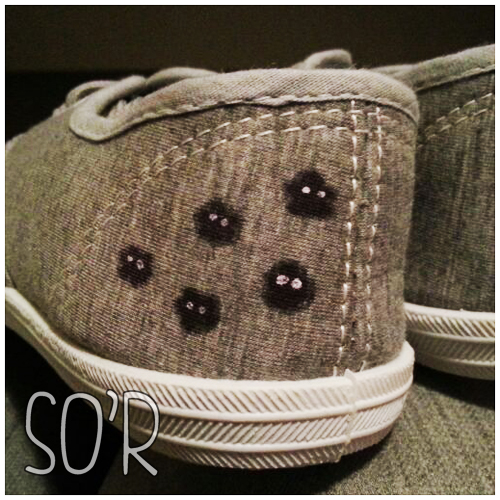
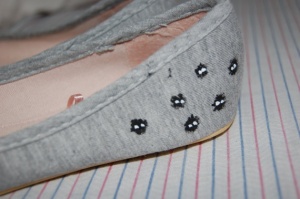
Back of the shoes (Spirits!)
This probably took me half an hour to do not including the wait time. Outlining the drawing takes literally 1 minute.
This was a very easy, quick & cheap DIY. You can also use this method not only to do Totoro shoes but for any design!
What do you guys think?
Lots of Smiles,
Sita


