So, I went a on a little white nail-polish hunt yesterday. I’ve actually been looking for a good white nail polish for a while and as you might know from my last post that included a white Sally Hansen, I was pretty disappointed due to its streaky-ness. I typically think that nail polish is a low-involvement product that is relatively cheap (the ones I buy anyway) so I never really research on what brand has the best stuff. However, I decided a few days ago that I would do my research before I went in stores. I found that most of the recommendations were to get OPI’s Alpine Snow and some suggest other brands like China Glaze, Sinful Colours as well as other brands that are not even easily accessible in Australia. Actually, from all the brands above, the only really accessible brand is OPI. But I refuse to pay more than $10 for a colour nail polish so OPI was definitely out of the question (unless there’s a crazy discount on them) as it retails for AU$19.95 here in Australia. The only accessible drugstore brand here in Australia that I saw people had suggested was Sally Hansen’s Xtreme Wear.

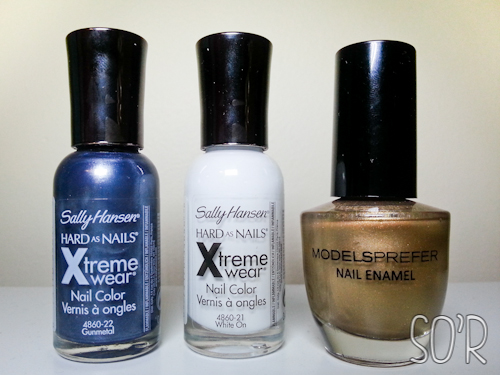
Sally Hansen Xtreme Wear in Gunmetal & White On, Models Prefer Make A Million.
Photograph taken under white LED light.
I don’t typically buy Sally Hansen’s colour nail polishes as the cheapest retails for between AU$6-7. However, Priceline had a promotion of buy 1 get 1 free! So I took a leap of faith and bought the white nail polish and got myself a gunmetal colour as my 2nd item. So that’s 2 nail polishes for $6.95 (or about $3.50 each).
I previously owned a Sally Hansen Xtreme Nail Polish in Flirt (#38) which I used to use quite often (it’s not with me at the moment hence I can’t wear it right now) so the consistency didn’t really surprise me. It’s a little thicker than my Revlon polishes and the Models Prefer nail polish but I think it works quite well.
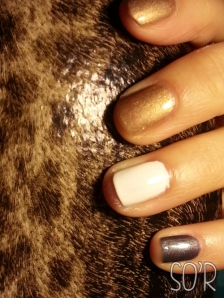
Sally Hansen “White On” is exactly what it is. A white creme polish. I don’t know what else to say about this other than it is white, shiny and I love it. I think the shine takes the “I-have-white-out-on-my-finger-nails” look away and I am actually considering painting all of my 10 fingers in white.

Base coat, 2 layers of colour and Sally Hansen’s Mega Shine top coat.
Photograph taken under yellow light.
Gunmetal” I picked up because it is almost winter here in Australia and I love me some good dark coloured nail polishes. It seems like winter is the more-appropriate season to wear dark polishes (but hey, I wear whatever colour I feel like whenever I feel like it). It’s got a slightly purple undertone and a slight shimer. The name fits the colour – it looks like a gunmetal colour.
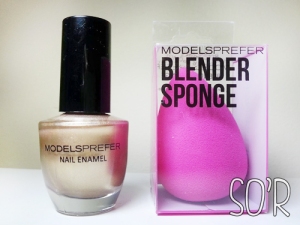
As I was walking around Priceline after I’d picked out the two nail polishes, I saw that Models Prefer had a promotion going on too. It was a free blender sponge every time you purchase at least 1 product. I’ve never tried a beauty blender and I am a sucker for nail polish and VOILA! I got sucked into buying this really pretty light bronze/gold colour even though it costs $5.99 ($1 over my limit). However ended up being my favourite nail colour I’ve ever had so far. And the bonus blender sponge is probably worth more than $1.
To me this colour screams out luxury and expensiveness. It’s subtle enough to wear everyday but I’d imagine it would look fabulous with a champagne-coloured, shimery but elegant dress or to dress up a little black dress.

Models Prefer Make a Million + Blender Sponge
The formula is wonderful! It’s got a thin but opaque consistency and it’s got a really really big brush which I actually kind of like. It applied really well and it has a smooth finish.
I also bought a few other things which I might mention in another post but this was all the nail polishes! All in all I was really happy with my purchases and I can’t wait to wear these polishes again and again!
Let me know what you think of the colours and if you have any of them, do let me know what you think of them!
Lots of smiles,
Sita


